Up next in 10

Subscribe: https://bit.ly/28Kc0Cd
⏩More Info: ⏪
Like us on Facebook: https://www.facebook.com/theheartysoul
Website: http://theheartysoul.com
Show More Show Less View Video Transcript
0:00
Hey everyone, Chef Trevor here, Chef de Partie of Benchmark Restaurant at the Canadian Food
0:04
and Wine Institute. And today, we're going to make chow mein, and it all starts with roasted spaghetti squash
0:10
So let's get started cooking with Trevor. Alright, so, unconventional chow mein today
0:35
Instead of noodles, instead of all that gluten, we are going to use roasted spaghetti squash
0:40
And all I've done to roast the spaghetti squash is I've rubbed it with a little bit of olive oil, salt and pepper
0:46
and I've let it roast in a 400 degree oven for 30 to 40 minutes. And what you want is your spaghetti squash to come out of the oven and just be tender
0:54
and you should see all those little spaghetti strands start to peel away. Okay
1:00
We're going to let that continue to cool for a couple minutes while we work with our other vegetables
1:04
And for our stir fry today, we are using savoy cabbage, celery, green onions, a regular white onion, carrot, ginger, garlic
1:15
an interesting sugar product made from coconuts called coconut sugar, olive oil, and tamari soy sauce
1:22
When we make a stir fry, what we characteristically want to think about is the crunch of the vegetables maintained throughout the dish
1:28
So, when we're cutting, we want to make beautiful, big cuts that stay crunchy when we finish that off
1:34
So to start with our celery, I just want to cut them into really long, diagonal pieces
1:42
And that's going to give us a really fun shape, but at the same time, it's also going to maintain its crunch when we fry it quickly in the pan
1:49
Next, we're going to take our cabbage and transfer our celery back off of our cutting board
1:54
because we only want to be working with one vegetable at once. So, I've taken the cabbage and I've cut it in half, because I'm only going to use half today
2:01
There's something else we have to remember. We always want to make sure our outer leaves are still really tense around the cabbage
2:07
Those are our protector leaves, so they're going to be really dry and leathery, and they're not going to taste very well
2:13
What we want are the tender middle leaves. So when we're at the grocery store and we see one that's got lots of green leaves on the outside
2:19
we want to make sure to pick all those away to reveal the clean middle of the cabbage
2:23
Next thing we've got to do is take that really big core out of the cabbage
2:27
So all we're going to do is take our knife and insert it at the very top and cut down beside it
2:33
Do the same thing on the other side to remove that core
2:37
And if there's a little piece left because you can't really see where it goes, just trim it out
2:43
Now what you want to do is make a flat surface again, and you want to cut it into another quarter
2:55
And then all you're going to do is make straight down cuts to shred that cabbage
3:01
You want to try and get really thin shreds like this. If you're making a lot of this and you want to use lots of cabbage, because remember, cabbage does cook down
3:11
so what looks like a lot at the beginning will actually be less at the end
3:15
It will be about half of what you start with. Once our coleslaw is done, we're just going to transfer it to a bowl
3:21
and we're just going to set it aside while we finish working with our other vegetables
3:25
Again, we've got that beautifully squared off peeled carrot ready to be julienned
3:30
And just to review, our julienne is thin slices, all uniform
3:40
And all the same size. All we're going to do is just fan those out
3:47
And using our knife, we're just going to make straight down cuts now
3:54
Now the trick to stir fry is you want to have everything ready to go before you even turn on the frying pan
4:00
because once you start, it's going to happen hard, and it's going to happen fast
4:04
so that we maintain the integrity of those vegetables. So our next cut to make is our green onion
4:10
And just to clean our green onion, all we want to do is take that little top piece off there
4:15
where the roots are still intact. And the fun part about this is you literally have to buy one bunch of green onions at the beginning of the summer
4:23
and every time you use one, you cut this little root off, and you go outside and you plant it in your garden
4:28
and within three to five days, a new green onion will start to grow out of this
4:32
and you'll have green onions for free all summer long. Because it's winter time now, I'm going to throw it away
4:37
You just want to make sure with your green onion that you're peeling off this really dry outside protector layer
4:45
And we're just going to make some long, hard cuts here. Then, following our lesson from previous episodes, I have one onion diced perfectly
4:58
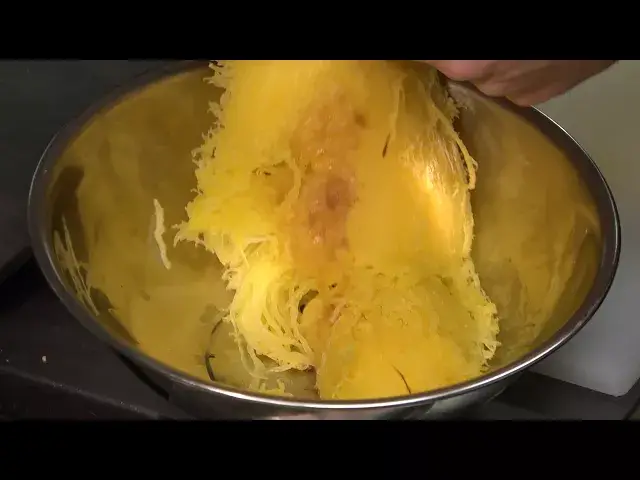
So with all the other ingredients ready, we're now able to work with our squash
5:02
All you want to do with spaghetti squash is you delicately want to kind of peel away the inside
5:09
to reveal all those awesome spaghetti strands. And you want to be delicate here because you don't want to ruin their integrity
5:16
You don't want to break them all apart. So all we're doing is taking that spaghetti out
5:22
And if you've done your job right, it should just kind of peel nicely away from the squash
5:27
And then taking a fork, you just kind of want to separate apart all of those strands
5:32
You can use your fingers too. The idea here is you've only cooked the squash enough to separate those strands
5:39
You haven't cooked the spaghetti squash into mush. If you've done that, this dish won't work out properly
5:45
And we'll start working with our other half. You just want to take your fork and take your fingers
5:53
and you just want to kind of work it around, making sure to separate all those spaghetti squash strands as best as possible
5:59
And because we're working with stir-fry today, I want to keep our garlic and ginger pieces very big before we go into the pan
6:07
So all we're going to do is our same technique that we used with the carrot
6:11
we are going to use with the ginger. And the reason we're doing it this way is we really want the oils and natural flavors
6:18
from the ginger and the garlic to actually fry themselves out into our oil that we add to the pan
6:24
so that they add an extra level of flavor of that cooking really fast
6:28
And we're going to do that with our garlic. And we're going to do that with our ginger
6:32
And we're going to do that with our garlic. And we're going to do that with our ginger
6:36
And we're going to do that with our garlic. And we're going to do that with our ginger
6:40
And we're going to do that with our garlic. And we're going to do that with our ginger
6:44
And we're going to do that with our garlic. And we're going to do that with our ginger
6:48
And we're going to do that with our garlic. And we're going to do that with our ginger
6:52
And we're going to do that with our garlic. And we're going to do that with our ginger
6:56
And we're going to do that with our garlic. And we're going to do that with our ginger
7:00
And we're going to do that with our garlic. And we're going to do that with our ginger
7:04
And we're going to do that with our garlic. And we're going to do that with our ginger
7:08
And we're going to do that with our garlic. And we're going to do that with our ginger
7:12
And we're going to do that with our garlic. And we're going to do that with our ginger
7:16
And we're going to do that with our garlic. And we're going to do that with our ginger
7:20
And we're going to do that with our garlic. And we're going to do that with our ginger
7:24
And we're going to do that with our garlic. And we're going to do that with our ginger
7:28
And we're going to do that with our garlic. And we're going to do that with our ginger
7:32
And we're going to do that with our garlic. And we're going to do that with our ginger
7:36
And we're going to do that with our garlic. And we're going to do that with our ginger
7:40
And we're going to do that with our garlic. And we're going to do that with our ginger
7:44
And we're going to do that with our garlic. And we're going to do that with our ginger
7:48
And we're going to do that with our garlic. And we're going to do that with our ginger
7:52
And we're going to do that with our garlic. And we're going to do that with our ginger
7:56
And we're going to do that with our garlic. And we're going to do that with our ginger
8:00
And we're going to do that with our garlic. And we're going to do that with our ginger
8:04
At this point, it may look like a lot, but remember, it is going to cook down
8:08
Making sure to just get the rawness off of those vegetables, but keeping their integrity
8:12
Once you kind of hear that hard searing going away, Once you kind of hear that hard searing going away
8:16
you know that you're about done. So see how everything's kind of shrunk down just a little bit
8:20
So see how everything's kind of shrunk down just a little bit, but we've still maintained some awesome crunch
8:24
but we've still maintained some awesome crunch. And if we want, we can enhance the moisture coming out of that
8:28
And if we want, we can enhance the moisture coming out of that with just a little bit more salt
8:34
And now that you've got some space in the pan again, And now that you've got some space in the pan again
8:38
and your vegetables are still beautiful and vibrant and crunchy, and your vegetables are still beautiful and vibrant and crunchy
8:42
you're ready to add in your spaghetti squash. you're ready to add in your spaghetti squash
8:46
And at this point, all we're trying to do is just warm up that spaghetti squash And at this point, all we're trying to do is just warm up that spaghetti squash
8:50
from being roasted so that it can mimic those chow mein-style noodles. from being roasted so that it can mimic those chow mein-style noodles
8:54
from being roasted so that it can mimic those chow mein-style noodles. Being careful here, you just want to kind of fold everything together
8:58
Being careful here, you just want to kind of fold everything together. And as you add a little bit of moisture to that spaghetti squash
9:02
And as you add a little bit of moisture to that spaghetti squash, the strands will start to fall apart
9:06
and everything will mix together, coming together like a classic chow mein dish
9:10
coming together like a classic chow mein dish. Once your spaghetti squash is warmed through
9:14
Once your spaghetti squash is warmed through, you are ready to go to the plate
9:24
We're just going to start by plopping down We're just going to start by plopping down
9:28
some of our spaghetti squash noodles in the middle, some of our spaghetti squash noodles in the middle
9:32
and getting some of our beautiful garnish right there on top. and getting some of our beautiful garnish right there on top
9:38
Finish it with some fresh scallion, Finish it with some fresh scallion
9:42
just to garnish the top, and just a sprinkle of toasted sesame seeds
9:46
and just a sprinkle of toasted sesame seeds. And there you have it
9:52
Crispy cabbage, crunchy vegetables, all with unconventional noodles, and chow mein, absolutely delicious. Enjoy
#Cooking & Recipes
#Food
#Kitchen & Dining
#Jobs & Education
#Fruits & Vegetables