Up next in 10

Subscribe: https://bit.ly/28Kc0Cd
⏩More Info: ⏪
Like us on Facebook: https://www.facebook.com/theheartysoul
Website: http://theheartysoul.com
Show More Show Less View Video Transcript
0:00
Hey everybody, Chef Trevor here, Chef de Partie of Benchmark Restaurant at the Canadian Food and Wine Institute
0:05
And today, we're going to be making chili. And it all starts with quinoa
0:09
So let's get started cooking with Trevor. So the first thing we need to do today is cook our quinoa
0:33
And what I've already done with this quinoa, which will always help you when you're cooking, is I've actually soaked it in water, drained it, and let it sit overnight
0:40
And what I've done doing that is I've actually released any excess starch off the quinoa
0:45
that might be allowing it to get mushy or letting it not cook properly
0:50
And it kind of gets nice and dry, and it flakes apart like oats. And every single kernel is separated
0:56
And that's what we want when we start. And all we're going to do is take that quinoa, pop it into a pan
1:01
and we're going to add 12 ounces, or 1 1⁄2 cups, of water
1:07
And all we want to do is turn our pot on and let that come to a simmer
1:13
Now there's a lot of common misconception when it comes to cooking quinoa. A lot of people think they need a lot of water, like pasta
1:19
and they need to boil this quinoa in there and strain off all the water. But the reality is, if you drain it, let it dry
1:26
you can cook it exactly like rice, and it comes out beautiful and fluffy every single time
1:31
And that's how we're going to cook our quinoa today, because we want it nice and fluffy and full to stimulate the texture of the meat
1:37
that would have been in our chili had we used ground beef, ground chicken, ground pork, or ground turkey
1:43
So it's going to happen pretty quickly because we don't have a lot of quinoa for this recipe
1:47
so you want to make sure you're right there to give it a nice stir. And one thing we want to do, because we don't have another chance to
1:54
is we want to season this quinoa now. So all we're going to do is add some sea salt
1:59
And you can be generous here. It should be a little bit like ocean water at this point
2:03
because you will not have another chance again to season that quinoa
2:07
Any seasoning you add after this point will just be surface. You'll notice that the quinoa and the starch, as it boils, starts to make this froth
2:15
And that froth is actually the starch that's going to help thicken our chili later
2:20
So once we get to this point, we're at a rolling boil. We just want to give one quick stir, give it a cover
2:26
and we want to go all the way down to a nice low simmer
2:30
And we just want to let that sit covered so that it steams nicely and the quinoa cooks beautifully and it plumps up and it gets nice and fluffy like rice
2:38
Vegetables for our dish today, we are going to be using what's known as a partial trinity
2:43
or peppers and onions as the vegetable base for our chili. And all I've done with the onion is I've cut off the end and I've peeled it in half
2:51
But remembering I don't want to cry, I've left that core on. And all we're going to do with our onion is give it a nice dice
3:01
And if you remember, that cuts in. And then a nice slice down
3:07
Don't worry if some pieces fly away from you. You're not after perfect little squares here
3:13
You're just after uniform pieces. And the best part about dicing your onion this way is that if you leave this little core on
3:20
this little teeny tiny insignificant piece, you will never cry again when you're cutting an onion
3:28
Leaving that core or root on the onion allows us to cut it without releasing the chemical
3:34
or the milk from the onion which actually releases the gas that makes you cry
3:39
So breathing through your mouth, breathing through your nose, putting a spoon in your mouth
3:43
covering your face with saran wrap, any old wives tale you choose
3:47
the only one you need to remember is the facts. And the fact is, you leave that core on, you will not cry anymore, I guarantee it
3:59
Next we're going to take our two red peppers and we're just going to give them an equal sized dice
4:03
because we want them to start cooking evenly. And all we want to do is just take the bottom off and the top off of our pepper
4:10
staying as close to the top as possible so that the only piece we're wasting is the little green place where it grew
4:16
And we're just taking that pepper and cutting out the inside ribs
4:22
Remember, every time we're cutting a vegetable, we are always trying to get to a flat surface
4:27
Okay, so you're just going to get these peppers from not being round anymore
4:32
to being a nice flat easy shape to work with. What I like to do when I'm cutting peppers is I like to work in manageable sections
4:51
so that way I don't have too many pieces going on at once. So I save those for the end and I cut each pepper in half and I make sure it's nice and flat on the board
5:00
And what you don't want to do when you're cutting peppers is no matter how sharp your knife is
5:04
you don't want to cut it skin side up. You'll always run into problems, you'll always feel like you're pushing through the pepper
5:11
and you might accidentally cut yourself. What we want to do is skin side down and that way we can slice easily through the flesh of the pepper
5:19
to make the size of stick that we want. And this process of cutting right now is known as dicing
5:27
And what we're looking for in a dice is a uniform size cube that will cook evenly when sautéed with our onion
5:34
So once we have our little strips like that, we just want to cut into nice little squares
5:40
Will all the squares be even the first time? No they won't
5:44
But the idea is you've learned a new skill today and the more you practice, the better you will get
5:49
And when it comes to these end pieces, we don't want to waste them either so we're going to dice them as well
5:54
And you're just going to make cuts along the top using its shape to form some more diced pieces
6:02
These ones will never be perfect because the top of a pepper is not perfect. We're not in search of perfection, we're just in search of uniformity
6:09
The next thing I want to show you is a really awesome trick on how to mince garlic
6:14
Normally I would say to you right now, go get that awesome $7 tool I like to use called the Microplane
6:20
But today, if you don't have one of those, I'm going to show you a new way. And all we want to do is take out a little aggression on that garlic and pound it out onto the cutting board
6:28
You're going to need three cloves for this because we really want the flavor to come through
6:34
And now, have some fun. A little rough chop, that's all you've got to do
6:38
Chop with your knife. Get all those pieces smaller because what we're going to do next is going to blow you away
6:50
How do we get this into a puree? Well, it's a simple process and all we've got to do is get our garlic into a little pile on our cutting board just like that
7:00
And we want to add just a little bit of salt. And the salt is going to act as an abrasive
7:04
And we're going to take the back of our knife and we're just going to press into that garlic
7:10
And the salt and the pressing of that knife is actually going to turn that garlic into a puree or what we call in the food world, a mince
7:20
And that's what we're looking for because we want to maximize the amount of garlic flavor that's going into this dish
7:27
So you just want to work back and forth, pressing into the garlic, working that salt in there until you're left with a wonderful garlic paste
7:38
And that's what we're after today. Set that aside and we're going to add that once our peppers and onions are sauteed
7:46
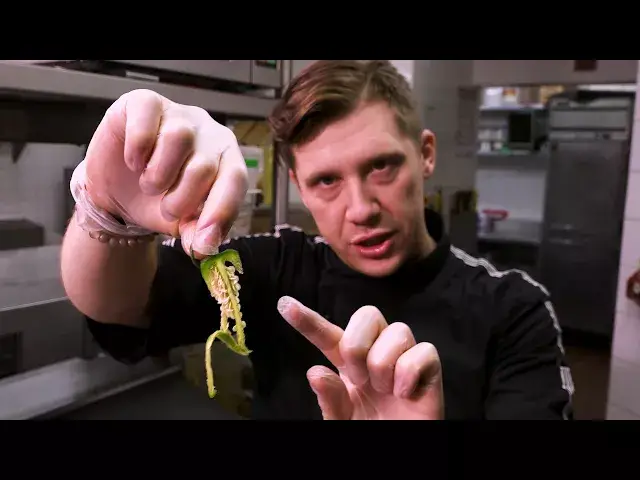
Next up, I need to put on some gloves. Super important, we'll be working with a jalapeno pepper today
7:52
If you've never worked with jalapeno peppers or hot peppers before, you have to realize that they themselves give off an oil called capsaicin
7:59
And that oil, when mixed with the oil from your hands, is very, very spicy
8:04
So if we're not being careful and using gloves or washing our hands appropriately, we could end up with some very, very uncomfortable eyes
8:12
We could have very uncomfortable mouths. Or sometimes people make the mistakes and they go to the bathroom and other places that they don't want to be spicy end up a little spicy
8:22
You'll laugh, but it's happened. And what we want to do is prepare these for the chili and we want to get rid of the seeds
8:28
Because the seeds and the ribbing are what are the hottest part of the jalapeno
8:32
We want the fragrance that the jalapeno is going to give. We don't want the spicy oil
8:36
So what we're going to do, we're just going to cut down the middle. And we're just going to cut out those seeds and that ribbing
8:46
That is the spice of the pepper, folks. All of that ribbing, all of those seeds, that's where the capsaicin is held
8:53
That's where the most spice from your peppers comes from. If you touch this with your bare hands, you better be prepared to accept the consequences
9:00
Once the seeds and the pulp are in the garbage, don't think you're scot-free
9:05
You've still got a long way to go. Don't think you're scot-free. You've still got oil on the knife
9:10
You've still got oil on the cutting board. So as soon as we're done with these jalapenos
9:14
we need to treat it as if we were treating the cutting board like we had raw meat on it
9:18
We want to discard. We want to completely clean down. So that anything that we do after this point does not leach spice into our other flavors
9:26
And all we're going to do is with our jalapenos, just like our red peppers
9:30
is we're going to give them a nice dice. And once our jalapeno is chopped, we're literally done all the prep work required for this
9:38
You want to remove your gloves. You want to remove your knife and cutting board and take it to the sink to wash
9:44
because we do not want anything else in this dish to be spicy. You won't need a cutting board or a knife for anything else
9:49
so it's okay to clean up your station. At this point, our quinoa is getting nice and fluffy
9:57
All the water has been evaporated. All we want to do now is take that off the stove and let it steam
10:05
and let the rest of that water incorporate inside and get that quinoa nice and fluffy
10:10
So by the time we're done sautéing all our vegetables and getting the base of the chili ready
10:14
our quinoa will finish cooking and we'll be able to add everything all together at the finish step
10:19
So to begin, we need to take our pot and we need to turn it on to a medium heat
10:24
And we want that pot to start getting nice and hot. To the bottom of our pot, we are going to add some olive oil
10:31
Now we want to use olive oil in this case, not extra virgin olive oil, because we do want to sauté so we don't want the olive oil to burn
10:40
Regular olive oil is what we want to cook with. You want to reserve your extra virgin olive oils for things like dressings or dipping bread into
10:48
because it has its own characteristic and really good flavor. So once the oil is nice and warm, we want to add in our onions
10:58
And remember folks, when you're sautéing something, you should hear that sizzle
11:04
when things go into the pan or else your pan is not hot enough
11:08
We're also going to add our peppers. And we're just going to let that sauté for a couple of minutes
11:19
Now because we don't have any beef or meat in this chili, it's going to come together relatively fast
11:25
We don't have to take the time for it to cook out and the meat to absorb the flavor
11:30
because what we have essentially is a sponge with the quinoa and it will absorb all the flavor of this chili really fast
11:36
So all we want to do is a nice quick sauté on these vegetables just to start releasing their flavor
11:42
And then we want to add in our minced garlic. Now I don't like to add my garlic right to the oil because I find it burns way too easily
11:51
So what I like to do is sauté the vegetables a little bit first and then add my garlic
11:56
so I maintain that awesome flavor. And of course no chili would be complete without beans
12:03
I have pinto beans here today and I have black beans here today. And then just to supplement, I've got one and a half cups of IQF corn
12:10
I've also got eight ounces of regular tomato sauce and I have one 24 ounce can of diced tomatoes in liquid
12:18
All of this will make the base of our chili. But to create the flavor of our chili, we need the following spices
12:25
We have chili powder, we have cumin, we have smoked paprika and we have oregano
12:31
All of these are the basis of any really good chili. So what we're going to do is once our vegetables have kind of sautéed together a little bit and got all happy
12:41
we are going to add in all our spices and we are going to let them toast with the vegetables
12:47
We just want to stir it around, make sure all the vegetables get coated nicely with spice
12:54
And what we're doing here is when you buy dry spices, where do you put them
12:58
You put them in the cupboard, they can sit there for a month, they can sit there for two months
13:02
And they're actually dormant and when we're cooking with them, we need to wake them up
13:08
And this toasting that we do beforehand with the vegetables just allows us to wake up the fragrance of those spices
13:15
So if you were here with me right now, you would notice everything starts to smell amazing and robust and rich
13:21
And that's because those flavors contained in the oils and those dried spices are being released into the air as we warm them up
13:29
And that's what we want if we want the base of a really good flavorful curry
13:33
So once everything is nicely coated, you're going to add in two cups of vegetable broth
13:39
And what we want to do with this vegetable broth is just kind of get every brown bit we can off the bottom of the pan
13:47
And kind of let those spices incorporate and dissolve so that they can start building the base of our chili
13:54
And you'll already notice that we're getting that beautiful, rich, brownish-red, silky color from our chili
14:02
And that comes only from toasting the spices, so very, very important
14:07
Alright, so our vegetables are getting nice and happy in there. They're simmering away nicely with our vegetable stock
14:15
We've got this beautiful, awesome brown-red color happening, which is characteristic to the base of all our chilis
14:21
Now we're going to add our tomato element. So we want to add in the juice and the flesh from one 24-ounce can of tomatoes
14:29
We're going to drop that right in. And we're going to notice things start to start thickening up right away, which is exactly what we want
14:37
We're going to add in eight ounces, or one cup, of tomato sauce
14:42
Homemade works best here, of course, but if you need to, please make sure you're buying all-natural or organic tomato sauce
14:49
Something without a long ingredient label. And what that tomato sauce is going to do is it's instantly going to start thickening up our chili
14:56
Next, we kind of want to round out the flavor here. So we've got a lot of robust, salty, savory things going on right here
15:02
We're just going to add three tablespoons of apple cider vinegar to kind of round everything out
15:10
Once everything starts to come together, you're just going to add in your beans
15:19
And your corn. Try and avoid using canned cornflakes. Try and avoid using canned cornfolks
15:28
Canned corn has a lot of processed sugars in it and a lot of unwanted ingredients that you do not need in your diet
15:34
What works best is taking your own corn off the cob in the summertime, putting it in the freezer
15:40
and reserving it for the winter when you need to make chili. Or you can simply buy a really good quality organic frozen corn product like I did today
15:48
Once you've got everything in there, we can then go back and look at our quinoa
15:52
Our quinoa, which if you've done your job right, should be nice and fluffy like rice
15:58
And when you're looking at the quinoa, you're looking for it to have that little germ on the outside
16:03
or it looks like a little white tail. It should just be kind of sprouting off of it
16:07
That's how you know that your quinoa has been cooked perfect. I'm just going to take all of that quinoa now and I'm going to add it into my chili
16:16
And it's going to also start thickening that sauce. Once you've got that quinoa in there, you just want to give it one final stir
16:23
so that everything starts to come together nicely. And you'll notice as soon as that quinoa goes in, the texture of the chili changes
16:31
and it starts to get nice and thick as if you had ground meat in there
16:35
Once everything is in there and incorporated, you're just going to let that come to a simmer
16:39
You're going to let it simmer for 25 to 30 minutes and then it's ready to serve
16:44
All right, it's been about 30 minutes and our chili has gotten nice and thick
16:49
and everything has married together nicely. So it's on to the last step
16:53
We just need to take one final test using a spoon. We're just going to taste that for seasoning
17:03
Mmm. It's delicious. All those flavors from the spices, from the tomato sauce, from layering up
17:10
to making sure we season that quinoa first, all that's coming together right now
17:15
The sweetness of the corn, the texture of the beans, it's all come together to be one really delicious chili and you won't even miss the meat
17:23
I'm just going to finish off just a balance here. I'm just going to add a little bit more chili
17:28
I'm going to add a little bit more chili. I'm going to add a little bit more chili
17:32
I'm just going to finish off just a balance here. I'm just going to add a little bit more salt and a little bit more pepper
17:40
I'm just going to stir that in and then we're ready to go to the plate
17:45
We're just going to take a really nice soup bowl. We're going to take one nice big heaping ladle
17:50
making sure we get all of that delicious chili ingredients. We're just going to spoon that into our bowl
17:58
And there you have it, black bean corn and quinoa chili, so good you won't miss the meat. Enjoy
18:27
For more information, visit www.Flydreamers.com
#Cooking & Recipes
#Food
#Culinary Training
#Salads
#Condiments & Dressings