Up next in 10

Subscribe: https://bit.ly/28Kc0Cd
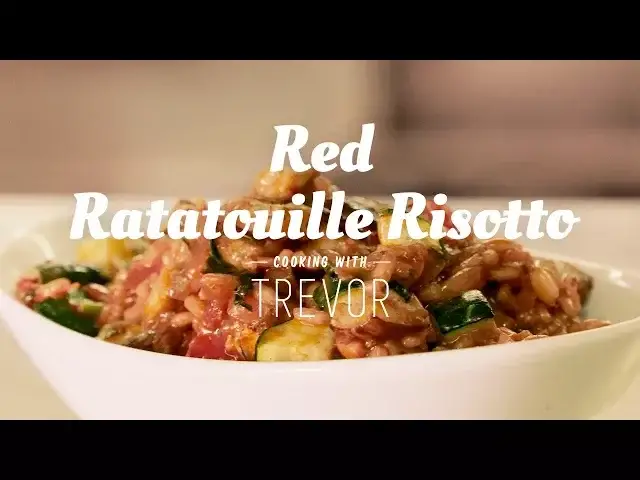
Join Chef Trevor as he teaches us how to make his delicious Red Ratatouille Risotto!
⏩More Info: ⏪
Like us on Facebook: https://www.facebook.com/theheartysoul
Website: http://theheartysoul.com
Show More Show Less View Video Transcript
0:00
Hey everybody, Chef Trevor here, Chef de Partie of the Canadian Food and Wine Institute
0:04
and today I'm going to show you how to cook risotto. So let's get started cooking with Trevor
0:08
Now today, you'll see I've got a wide variety of ingredients in front of me
0:31
That's because we're going to make ratatouille risotto. Ratatouille is a classic French side dish that we're actually going to roast today and
0:38
fold into our delicious tomato red wine risotto. So the first thing we need to do is prepare our vegetables for the oven
0:45
What I have for the oven today is I have two green zucchinis and I have eggplants
0:51
Now you might be thinking these eggplants don't look like normal eggplants. These ones are called graffiti eggplants
0:57
The reason I'm going to use these today is because they have a little bit less seed pod
1:01
in the middle and more flesh. So when we roast them, they're not going to go characteristically soggy like our regular
1:07
eggplants do. Then, just to make our ratatouille final, we're going to use some cherry tomatoes
1:12
Okay, we're going to roast them whole, so little preparation needed for these
1:15
So the tomatoes are going to go right on our tray. Next, to prepare our zucchini, all you got to do is take off this little end right here
1:23
And when you're chopping your zucchini, always make it workable. So we're trying our best to get a flat surface so that when we're cutting, it's not going
1:31
to rock on us and we avoid cutting ourselves. And when we're thinking about roasting vegetables or folding them through something, we always
1:37
want to remember they need to be bite-sized. So you don't want your zucchini to be any bigger than that, okay
1:44
Zucchini is a wonderful vegetable. It's full of vitamins. It's a green vegetable, which means it's got chlorophyll, which is super good for the body
1:51
It doesn't really have its own flavor. So we can really add a full depth of flavor to this dish that soaks through the zucchini
1:58
and becomes a delicious nugget-in-the-mouth flavor when we eat it later. Now, for our eggplant, we need to take this off because it is inedible
2:06
And all we need to do is just simply nip off the top. We still want to make flat surfaces
2:12
And we're going to make nice cubes, same size as our zucchini. Why
2:17
So that they all cook at the same rate. And then as soon as we have all our cuts like this, flat surface again
2:23
And we're just going to make centimeter by centimeter cubes of that eggplant
2:27
And you'll notice when you're cutting it that there's actually a lot less seeds in there
2:33
And they're very small compared to what a regular eggplant would be
2:37
And that's why we want to use this type of eggplant for our ratatouille today. Because when we're roasting it in the oven, we don't want it to turn to mush
2:44
We want it to have that little bit of bite to it still when we fold it through our risotto later
2:49
Best thing about working with something like an heirloom variety or a local company is
2:53
the extreme amount of flavor and care that goes into the preparation of that vegetable
2:58
Because we could go ahead and buy eggplants that came from California
3:03
But I could tell you right now that they were picked underripe. So by the time they get to us, they've been manipulated by a bunch of different people
3:10
And they really don't have that same care and love that went into them. And that's what we're looking for when we're doing something like a risotto or a ratatouille
3:18
Since we're doing that, it's highlighting the flavor of the vegetable. We want to start with a really high quality vegetable
3:25
Now that I've got all my vegetables ready for the oven on the tray, I just want to get
3:28
my hands in there. I want to mix them all together so that when they cook, their flavors all mix with each other
3:35
Just to help out the flavor of this, I've got six cloves of roasted garlic
3:40
You can use roasted, which is a simple process. You just throw olive oil over the garlic cloves and roast it in the oven until it becomes
3:46
this beautiful caramelized brown color. Or you could use raw. There's no right or wrong here
3:52
I'm just using roasted today because I want a little bit more sweetness from the garlic
3:57
And I'm just going to kind of give that a mush and let that fall onto my vegetables
4:02
And I'm going to season with a little bit of salt. We want about a tablespoon of salt total here
4:09
Because what the salt is actually going to do in this respect is draw the bitterness
4:14
out of the zucchini and the eggplant when it's roasting. Then we're going to take some black pepper
4:19
We're going to use two teaspoons of black pepper. And then I'm going to take my squeeze bottle of extra virgin olive oil
4:25
And I'm going to drizzle two tablespoons over top of those vegetables
4:29
Don't be afraid to get messy at this point because you are going to wash your hands later. We're just going to mix this all around, making sure that the salt and the pepper and that
4:37
roasted garlic really nicely coats everything. Let's use the whole tray and push everything out so it becomes one flat layer
4:47
And that way, all the heat from the oven is going to evenly penetrate all of these vegetables
4:52
and they're all going to roast to a nice caramelized brown color. What we want to do now that we have our vegetables on the tray is transfer them to a 350 degree
5:00
oven for 30 to 45 minutes or until the vegetables are nicely golden brown and roasted
5:07
So, next thing we need to do while our vegetables are roasting in the oven is we need to prepare
5:13
our risotto. And that is going to take some patience and time
5:17
This is one of those dishes where we can't just set and forget. It's going to take a lot of love
5:21
It's going to take a lot of care. And if you finish the end product, all that love and care goes right into that risotto
5:27
And we're going to have a beautiful, silky, delicious risotto that's going to taste beautiful
5:33
The first thing we need to do for that is dice our onion. So, all I've done is I've taken the top off the onion and I've peeled it and washed it, okay
5:42
And I've left the little root on the bottom. And the trick to that is no tears
5:46
Because as soon as we cut this little root off the onion, you'll notice a little white milk leaches out of the onion
5:51
That is actually the chemical that makes you cry. So if we leave that on, no more tears
5:57
Now, this is going to take some time to get proper, but don't fret
6:02
You will get better as time goes on. And all you need to do is make horizontal cuts through the onion all the way almost
6:09
to the core with your sharp, sharp knife. And you're going to do that all the way up the onion
6:18
Once the onion has all these horizontal cuts through it, we're then going to make vertical cuts
6:25
We're just going to come down the onion like this. Don't worry if a couple pieces fall off on you onto the cutting board
6:30
It's not a big deal. Then all we need to do is with our sharp knife, make straight down cuts with the onion
6:37
And you'll notice that they all fall away into perfect cubes
6:47
And that's how you dice an onion. And now, while our vegetables are roasting in the oven, we've figured out how to chop
6:52
our onion, we are going to build our risotto. So the first thing I need is a stainless steel, heavy-bottomed pot on medium heat
7:00
And we're going to put two tablespoons of our extra virgin olive oil in the bottom
7:04
of that pot. We're going to add our perfectly chopped onion. In it goes
7:12
It should start to sizzle and sound amazing right away. If it starts to burn immediately, we know our pan is too high
7:19
We want to find that balance so that the onion just cooks but doesn't burn
7:23
So what we're looking for is the onion to go translucent almost
7:28
So that's going to take about 10 to 15 minutes. And you just want to keep stirring and stirring
7:38
If we let this sit on the bottom, the natural sugars in the onion are actually going to
7:43
come out and they're going to start caramelizing the outside of the oven. And it's going to start to go brown and dark
7:48
And it's also going to lend a bitter characteristic to this dish, which we absolutely do not want
7:55
Staying over the pan and constant stirring is very important here. So a half an hour has passed in our 350 degree oven
8:03
And we're just going to check our vegetables. And that is exactly what we're looking for
8:09
We're looking for everything to be a little bit golden brown on the edges
8:14
And we're looking for those tomatoes to have a slightly blistered skin
8:18
And that's going to lend an amazing, rich, sweet tomato to our dish
8:23
So our 10 minutes of vigorous stirring is up. And you can see that the onions have started to take on a see-through characteristic
8:30
That's when we know we're ready for the next step. And the next step is to add one tablespoon of chopped rosemary and one tablespoon of
8:39
chopped thyme. That's going to add an earthy fragrance that's going to lend itself really well to our roasted vegetables
8:45
So in it goes. One quick stir around just to make sure those herbs get all over those onions
8:51
Next we're going to add one cup of sun-dried tomatoes to our onion mixture
8:56
In they go. Make sure they get nice and happy in there with the onions
9:01
And because I'm a chef and I can't do anything without booze or wine, we're going to add
9:06
one cup of red wine to our risotto. Now it can be any kind of red wine you want
9:11
I personally would use the red wine I'm drinking while I'm cooking my risotto
9:15
Because we're going to spend a half an hour here together. So we're probably going to want a bottle of wine while we're stirring
9:29
Almost immediately after we add the red wine, we are going to add our arborio rice
9:34
Arborio rice is a specific type of rice used all the time for risotto
9:39
And there's two schools on this. Some people like to toast the outside of the rice first
9:43
I like to add it right away as soon as I add the wine to draw out that first amount
9:48
of starch faster. So I'm just going to slowly pour that in
9:54
And what we want to do, the reason we want to get that in right away with the red wine
9:58
is because we want the starch to start drawing out of the rice as that red wine reduces
10:04
As the red wine reduces, the outside of those rice grains are going to start to go translucent
10:10
And what we're actually doing when we're cooking rice risotto away is we're actually slowly
10:15
drawing out the starch from the rice grain instead of steaming it and keeping all the
10:20
starch inside. And what that's going to do is it's actually going to create that classic characteristic
10:27
velvety texture of the risotto at the end. And from this point on, we cannot leave
10:34
We have to continuously stir. And everything is already starting to take on this beautiful, rich red color
10:45
And we're going to want to enhance that. And how do we enhance that? Simple
10:49
We're going to take one tablespoon of tomato paste and add it in before our first addition
10:56
of stock. And we just want to give it a quick stir so that we remove some of that tartness from
11:04
its initial characteristics. That's going to give us a really awesome, rich red color
11:10
At this point, I would usually add butter. But today, we're going to use a unique substitute made from coconut oil
11:19
And this is a company called Earth Balance that makes a lot of really amazing products
11:24
for people who are being conscious about their dairy intake. We are going to add two tablespoons of the Coconut Earth Balance to our risotto just
11:33
so we can start the process of creating that velvety texture. And we just want to stir that around, making sure to get it coating nicely on all the rice grains
11:46
And that little bit of fat is going to help protect the rice
11:50
Because what we're looking for here is, like I told you in our pasta classes, is al dente
11:55
rice, or something that has just a little bit of bite left to it
11:59
And that's how the risotto process works. Something funny that people don't usually understand is that risotto, yes, is a dish
12:09
but risotto is also a method of cooking. And that's the method we're learning today
12:14
So you'll notice in my pot, we have no liquid left in the bottom of our pan
12:18
We've got beautiful starch and color happening. That is our indication that it's time for us to add our first addition of stock
12:26
Today we're going to be using vegetable stock. And the reason we want to add vegetable stock in addition is because we want to slowly pull
12:32
the starch out of the rice. And what we're looking for is before every starch addition, we're looking for the rice
12:38
to take on that velvety texture. So I'm going to start by adding in one ladle full, or one cup, of vegetable stock
12:49
And from this point, we just need to continuously stir so that that starch in that rice doesn't
12:56
burn to the bottom of our pot. And you can see almost instantly how the starch affects the stock as soon as it hits the pan
13:04
At this point, we want to turn our pan down to a low heat
13:12
All right, it is now time to go back to our risotto, give it a taste, and finish it off
13:17
And it's a little bit loose. That's okay, because what happens to starch as it cools down and comes to you at the table
13:25
it is going to be the perfect consistency that you want for a risotto
13:29
So we're just going to go in with a spoon. I've already tasted it a few times throughout the process, making sure that the rice is
13:35
cooking properly. And when I take this bite, we want it to almost take on that al dente texture like we talked
13:43
about in our pasta dishes. So this risotto is ready, and it is absolutely delicious
13:49
I am going to turn the heat down. It is so delicious, in fact, that I don't even need to add salt and pepper at this point
13:55
But what we are going to add to round out the flavor is a quarter of a cup of chopped
14:01
fresh basil. And we're going to add a quarter of a cup of pine nuts
14:09
Now the pine nuts are going to also lend a really unique, earthy flavor to those roasted
14:14
vegetables that we're going to fold through in a minute. Just a reminder to all of you, this whole process, getting the rice to this point, getting
14:22
it to that perfect bite, takes about 30 to 40 minutes to complete
14:28
So really, risotto is an excellent dish that you want to use as a show-stopping dinner
14:33
party item. Something where you know you're going to be spending time in the kitchen, the kids aren't
14:38
around, the dogs aren't running at your feet. This is a you time
14:42
This is a bottle of wine. I'm over the pot. I'm stirring. I've got lots of care and love
14:47
And I'm just going to add in those pine nuts. And the final addition, of course, we cannot forget about our ratatouille vegetables
14:55
That's what's going to give us that amazing depth of flavor in this dish
14:59
So all we have to do is just simply add those to our risotto
15:04
Carefully, making sure not to spill any of that hard-earned time in the oven all over
15:08
the counter. So all I'm doing now is just taking the time to gently toss that ratatouille vegetable
15:15
through the risotto. And you'll notice now it's gotten beautifully thick, a wonderful consistency, and now you
15:23
are ready to go to the plate. And all we want to do at this point is take that beautiful risotto, getting as much of
15:34
all of that delicious ratatouille vegetable in there as we can. So beautiful, it doesn't even need a garnish
15:42
And there you have it. Super simple, ridiculously rustic risotto with ratatouille. Enjoy
#Cooking & Recipes
#Food
#Kitchen & Dining